On NARA Publications & working with difficult film
Nobody has more microfilm than the US Government — and no one has created more public domain microfilm publications than the National Archives and Records Administration, or NARA. In fact, Creekside Digital first ventured into the high-quality microfilm digitization industry as part of a software project built around NARA microfilm, and it continues to be a large part of our business today.

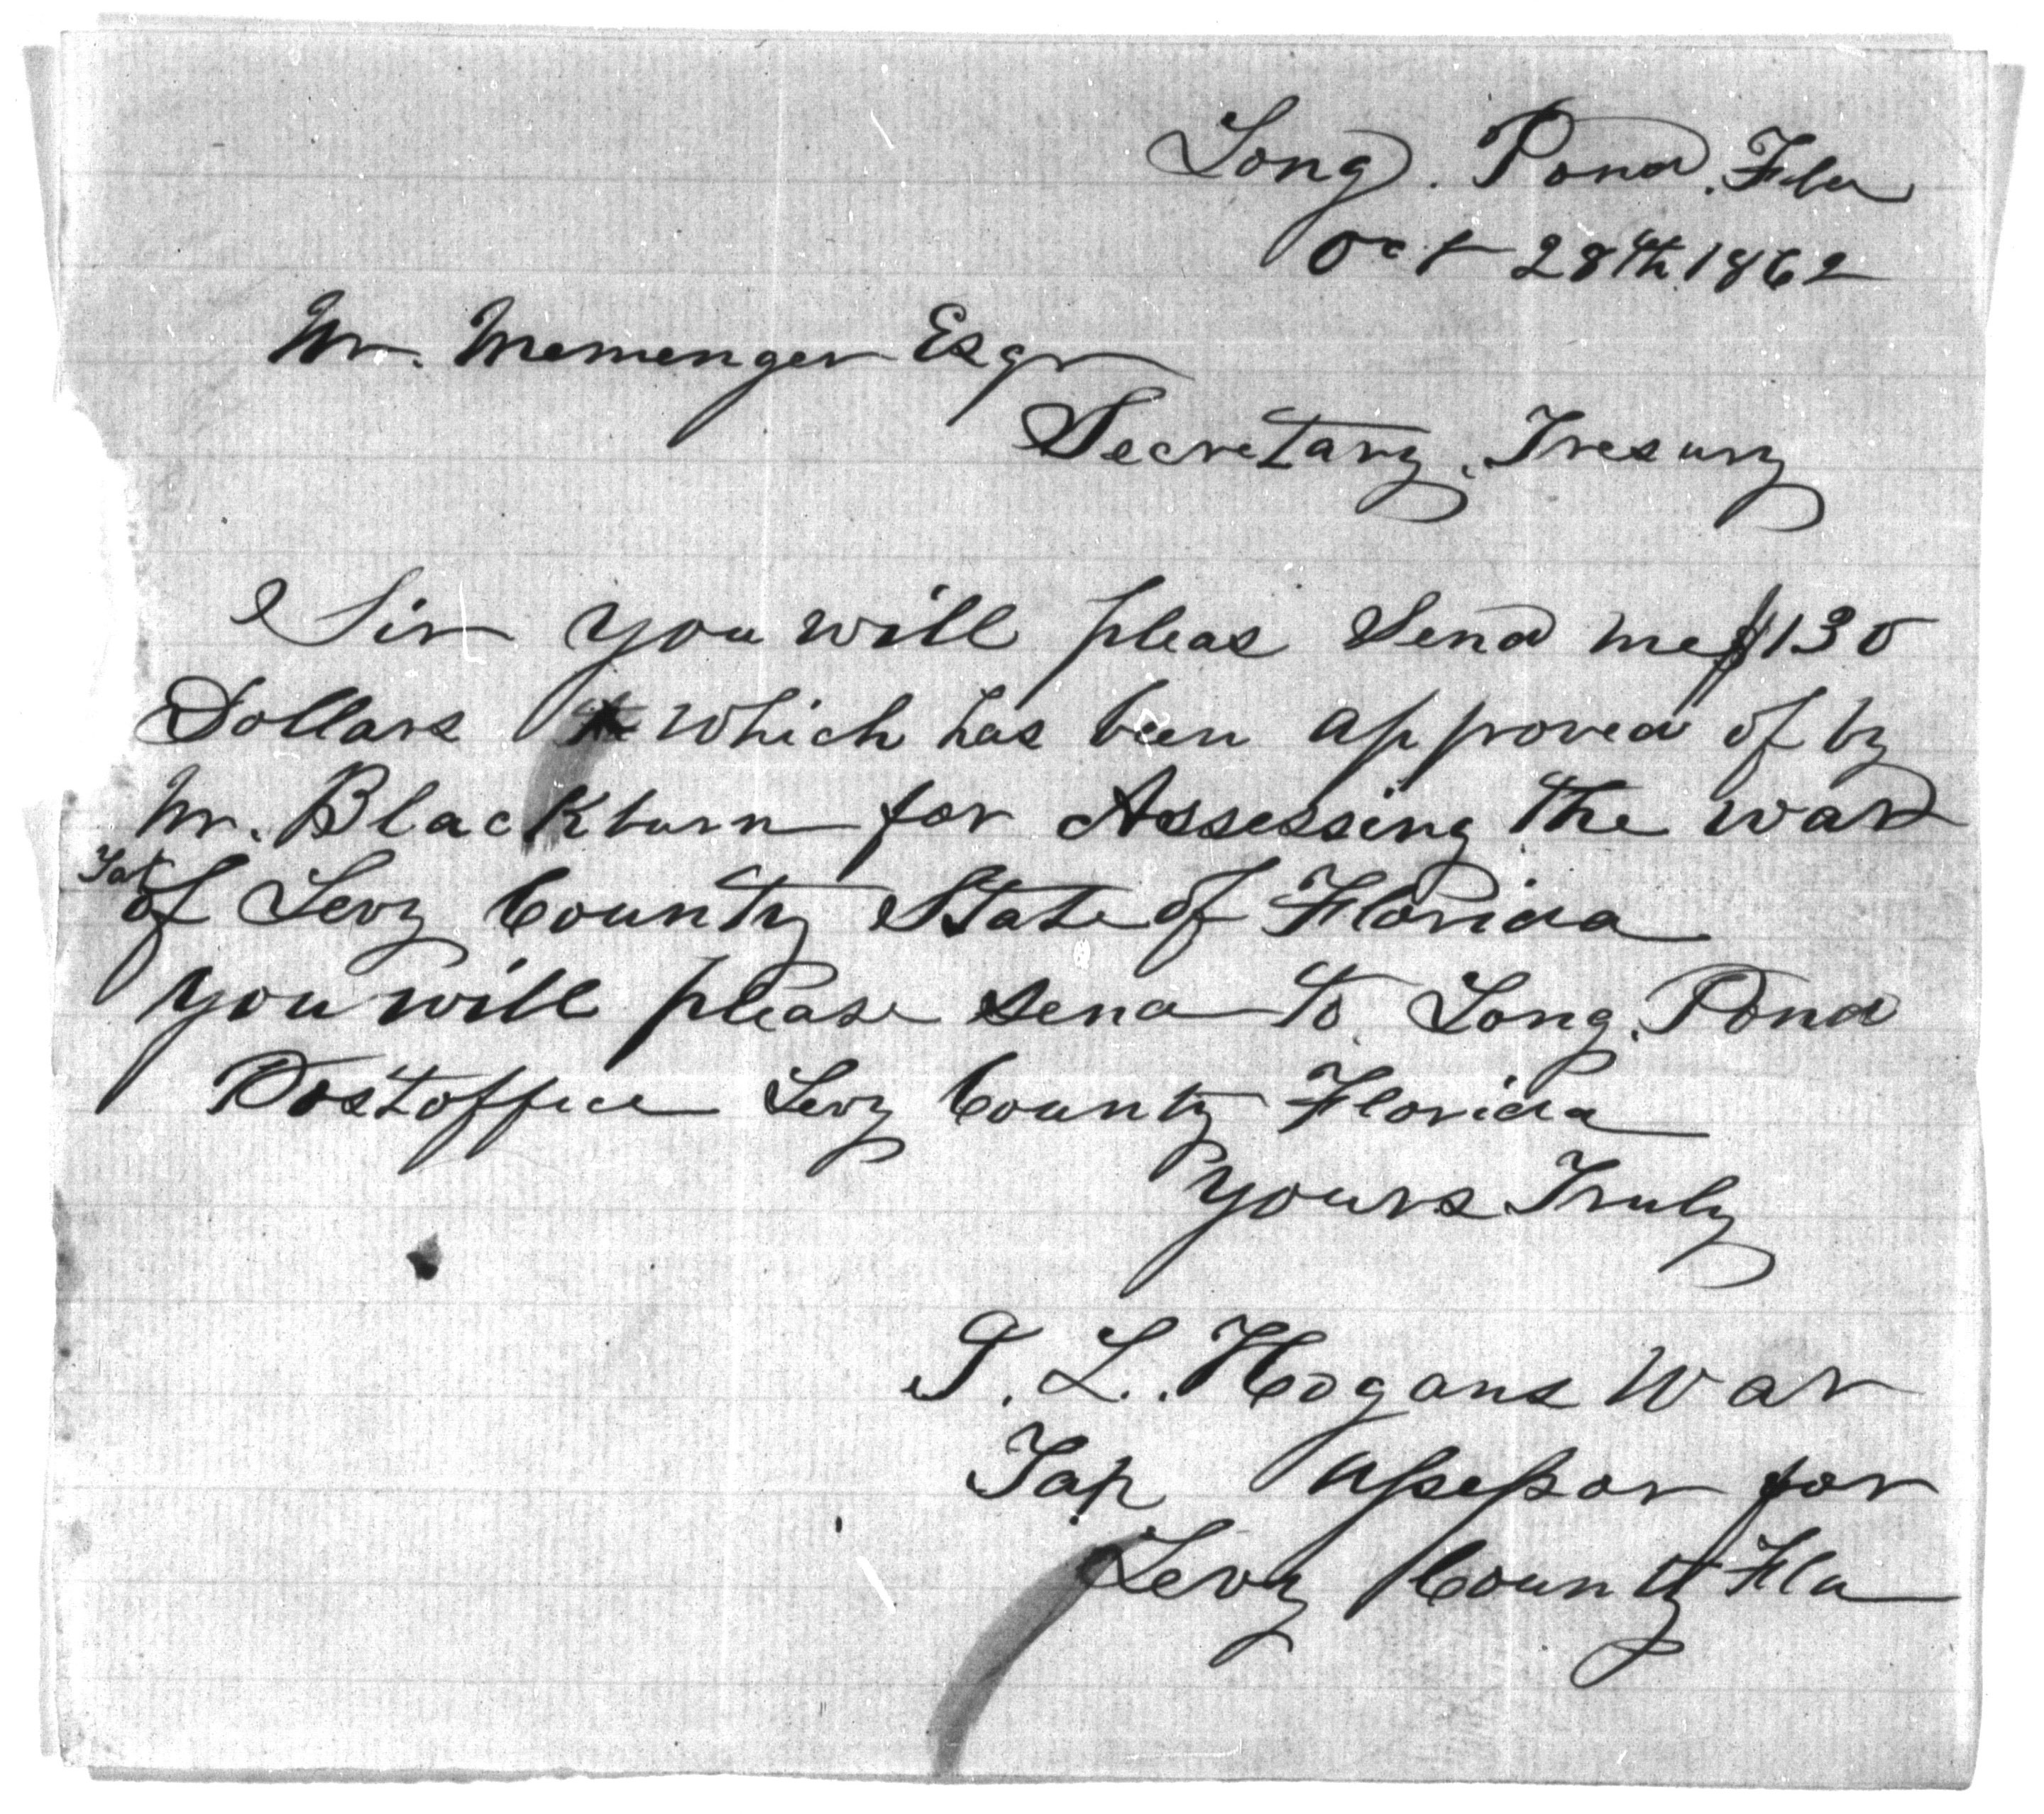
Period document from 35mm NARA microfilm (18x) preserving original paper texture and creases (click for detail: 300dpi JPEG @ 60% quality, 1.51 MB)
Currently, we’ve got another project in the shop that is all National Archives microfilm — in this case, period documents from the 1860s. About half is 16mm, and the other half is 35mm. Typical of NARA rollfilm, the original documents on the 16mm rolls are the same size has those on the 35mm rolls, but the reduction ratio is higher — meaning the frames are smaller, and more documents can fit on a single roll. This also means that there’s less image information in each frame with which to work, which means it’s harder to get a nice, tight focus and set the scanner’s critical settings. You really have to take your time. Each roll of film is different, and there’s no “magic button” which automatically configures the best scanner settings whenever a new roll is loaded. That’s up to the operator, and that’s where experience with the equipment and having “an eye” for what great images look like makes all the difference.
One common issue with scanning period docs on NARA microfilm is the tremendous variation in image density on the same roll. Often, a roll will have a sequence of very dark documents, followed by extremely light papers. This is makes it very difficult to optimally set lamp and gamma: too low, and you end up with a bunch of dark and mostly illegible pages (virtually impossible to frame detect) followed by a document scanned at “normal” brightness. Too hot, and yes, the darker frames become legible — but the previously “normal” documents become overexposed and details like the paper grain start to burn out. It takes a lot of extra time to get everything set “just right” in order to output great images across an entire 100′ roll of film.
Creekside Digital’s scanning platform offers an unprecedented level of bandwidth to allow it to better capture the full range of image density found in a given roll of film. Grayscale images no longer look like a poor Xerox copy or over-dithered; shades of gray are as true to the original document as the source film allows. And although perfect automatic frame detection remains a pipe dream with film of highly-variable density, we have software tools which allow a person to visually audit and correct the frame boundaries proposed by the machine.
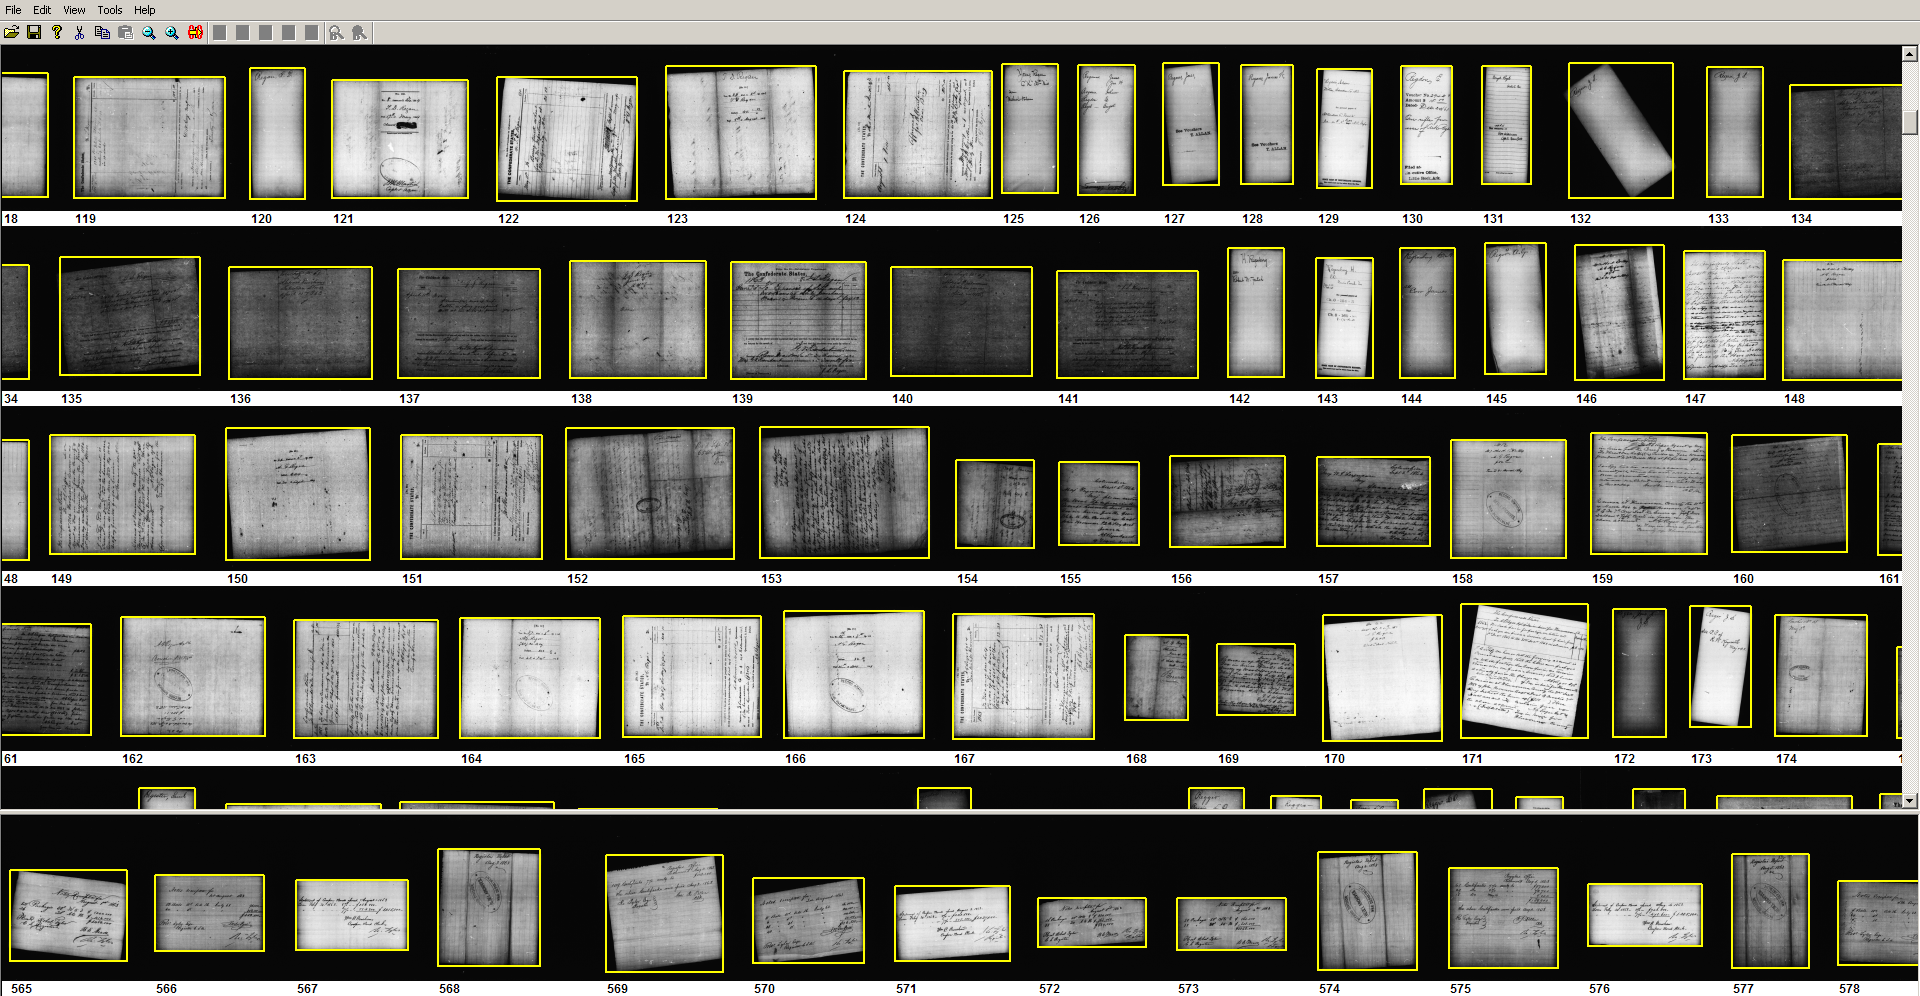
The screenshot shown here illustrates the high variation in film density we’re encountering on this project. Notice the automatic frame detection has done a good job at establishing initial frame boundaries (the yellow boxes). Any part of any yellow box can be grabbed by the operator with the mouse and dragged into the correct position. Frames can also be removed entirely, and dark frames which were cropped or skipped entirely by the machine can be added by a person prior to output. Try that with first-generation technology that outputs the images “on-the-fly” as the film passes through the scanner!

